Thursday, October 16, 2014

Glowing Bowling

This activity has been a favorite to my 2 year old and the little girl that I watch during the week. They have been playing this for two days now. I should have known this was a great activity they had a blast over the summer when we made water bottle bowling!


If you have your older kids to help you they can draw the faces on the cups which will be fun to see all the different faces you guys come up with. I wasn't brave enough to give the 2 year old and 1 year old a sharpie so I did it all!

What you need:

  • Plastic Cups (As many as you need we used 3)
  • Sharpie
  • Glow sticks 1 for each cup
  • Ball
What to do:
  1. Draw Ghost faces onto the cups
  2. Place a glow stick into each cup
  3. Set them up and have fun bowling
For more kids activity like this check out my Pinterest Board

DIY American Girl gifts


Hello Sorry I have been slacking this week but I am here with a double DIY gift that's perfect for that little girl in your life that loves American Girl dolls! I know my girl loves hers but I hate seeing the price on a lot of these things she wants for her doll. So I turned to Pinterest for some great DIY gift ideas for Christmas gifts.


 The first one that I will share with you is a DIY Hopscotch. Which is super cute and super easy to make. I used craft foam paper to make these. Cut out squares and write number on them. That's it! If you like you can add stickers or try to make them fancy.


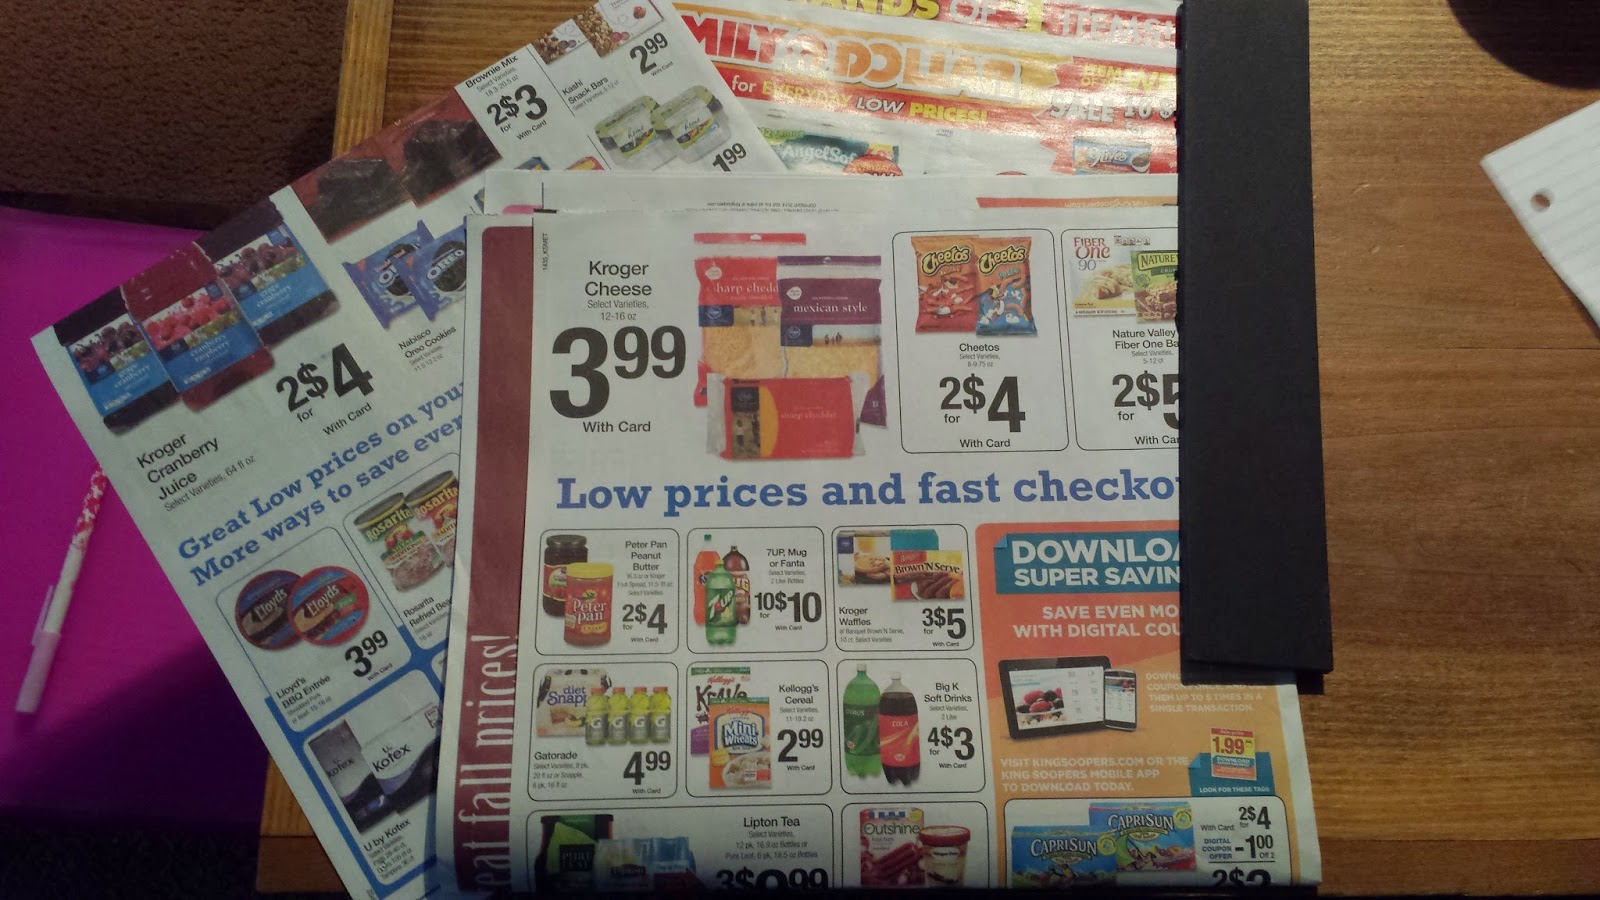
The next one was a little more time consuming but so cute when they are done. This one is making mini doll food out of store ads.

What you will need:
Store ads
Foam board
Glue

What to do:
Cut out the food you want from the ads.

Glue food to foam board and then trim the foam board. An excato knife worked the best for this.


Hope you enjoy making these and your little loves these for her doll!

For more great little girl stuff check out my Pinterest board.


Tuesday, October 14, 2014

Candy Corn Parfait


The recipe for the week has been a big hit at snack time for my kids. It's so simple they help make it which is fun for them. And I love it because they want real fruit not fruit snacks everyday!
Hope you guys enjoy this as much as we do.

Ingredients:
  • Oranges
  • Pineapple
  • Whip cream


Directions:
In a bowl start with a layer of Pineapple and then Oranges. Top with whipcream.
Enjoy!

For more fall recipes like this one check out my Pinterest page. Follow Kristina Morud's board Halloween on Pinterest.

Friday, October 10, 2014

DIY ABC Magnets


This is a cute DIY gift idea for the little ones in our life. We are starting letters with my 2 year old and I hate the cheap looking ones we had with our 5 year old...I'm still finding random missing ones around the house.

I used the idea from my previous post of turning your kids art work into magnets for this gift idea.

I love this idea because if you can use pretty scrapbook paper and make it more personalized. My son loves football so I used football skin paper.

What will need:


  • 12×12 scrapbook paper
  • Clear gems (I used the bigger ones)
  • Sharpie
  • Mod podge
  • Magnets

What to do:
1. Cut circles to the size of the stone. I had a circle cutter that I had in my craft stuff. If you don't have one trace the stone and cut them out.
2. Write a letter on each circle with the sharpie.

3. Place small layer of mod podge on the stone and then add the paper.

4. Once dry add your magnet.

For more great DIY gifts check out my Pinterest board!  Follow Kristina Morud's board Gift Ideas on Pinterest.

Thursday, October 9, 2014

Preserve Craved Pumpkins


The pinterest tips for the week is one just in time with the craving pumpkin season here!
Thank you Discount Queens for this great tip that I'm excited to try out this weekend.

To help preserve your pumpkins this season you will need
  • A large bucket (or a trash bag in your bath tub will work too! )
  • Water
  • 2/3 cup bleach

Place your pumpkin into the bucket. Fill with water and the bleach.  You will let this sit for 24 hours. After it sits pull out and let dry upside . Once dry it ready to be outside and look fresh for some time.

We will be trying this tip this weekend so I will update you guys on how it goes!

For more Halloween tips check out my Pinterest board.
Follow Kristina Morud's board Halloween on Pinterest.

Wednesday, October 8, 2014

Footprint Frankenstein


Today's kids activity is super cute for the little ones. It's a great way to save their small footprint :) Thank you Child Care Soup for this super cute idea.

It's real simple and Landon thought it was a blast to paint his foot and not get in trouble for it!
For this we just painted his foot and then press a piece of paper onto his wet foot. Once dried we glued on eyes and draw on the rest of the Frankenstein details. 

Simple and super cute!

For more Halloween idea check out my Pinterest board! Follow Kristina Morud's board Halloween on Pinterest.

Monday, October 6, 2014

Easy Pumpkin Brownies


Today's recipe is one that was on our family fall bucket list and it's pumpkin brownies!! I was all excited to try these. Let me just warn you now you must be a pumpkin lover to like these and also they are super sweet.

Thank you Cookies and Cups for this simple 2 ingredient recipe. On the page you can a recipe for a icing recipe if you want to add to yours. We didn't because it was sweet enough.
Yes you read that right this recipe only takes two things. What are those 2 things? Canned pumpkin and your favorite boxed brownies. For ours we used Pillsbury Fudge.

So here we simple easy fall brownies!
Ingredients:
1 canned pumpkin 15 oz
1 boxed brownie mix

Directions:
1. Preheat oven to 350 degrees
2. In a 9x9 pan line with foil and spray with non stick spray
3. In a bowl mix together brownie mix and pumpkin.
4. Once mixed pour into lined pan
5. Bake for 25-30 or until set.

That's it! Simple and yummy.

For more recipes like these check out my Pinterest board! Follow Kristina Morud's board Sweets to make on Pinterest.

Thursday, October 2, 2014

Family Fall Bucket List

Today's Pinterest tip is something that's fun and something to look forward to the fall season. Which is my favorite season with all the pumpkins and beautiful colors!

We sat down as a family and made of a list of things that we wanted to do this fall as a family. And I have to say it was so much fun and can't wait to fill up our checklist and make this a new family tradition! 

Some things that we added to our bucket list are:
  • Go to a corn maze
  • Make caramel apples
  • Jump in leaves
  • Hayride
  • Pumpkin patch
  • Drink apple cider
  • Eat Pumpkin brownies
  • Give thanks (Thanksgiving)
  • Watch football
  • Pick apples
  • Watch Halloween movies
  • Halloween crafts
  • trick or treating
  • Take photos in the leaves 

This weekend we will be adding stickers to it so when we are done I will post a better picture!
Hope your family enjoys this tip and Happy Fall! We would love to hear what you are putting on your list comment below!

Tuesday, September 30, 2014

Milk Jug Art

For the start of the Halloween season I thought I would share a fun recycling art project that the kids will love.

We took Lost Children's idea and instead of the stick we used a battery tea light to make a little table light for the patio. I like this idea better but it's up to you what you would like.
There are so many decorating ideas that you can do: 
  • Frankenstein (which we tried to do)
  • Ghost
  • Pumpkin 
  • even a cute little monster!


What you will need:
  1. An empty milk jug washed and dry
  2. Paint 
  3. Battery tea light

What to do:

1.) Paint and decorate your milk jug the way you would like.
2.) Once paint is dry cut around the lid area to make room for the tea light to sit in.

That's it! It's simple but time consuming. My kids got bored quick so I noticed I did most of it alone.

Would love to see your milk jug art on Instagram!

For more Halloween crafts come back next week for more Halloween crafts. Or check out my Pinterest boards! Follow Kristina Morud's board Halloween on Pinterest.  

Wednesday, September 24, 2014

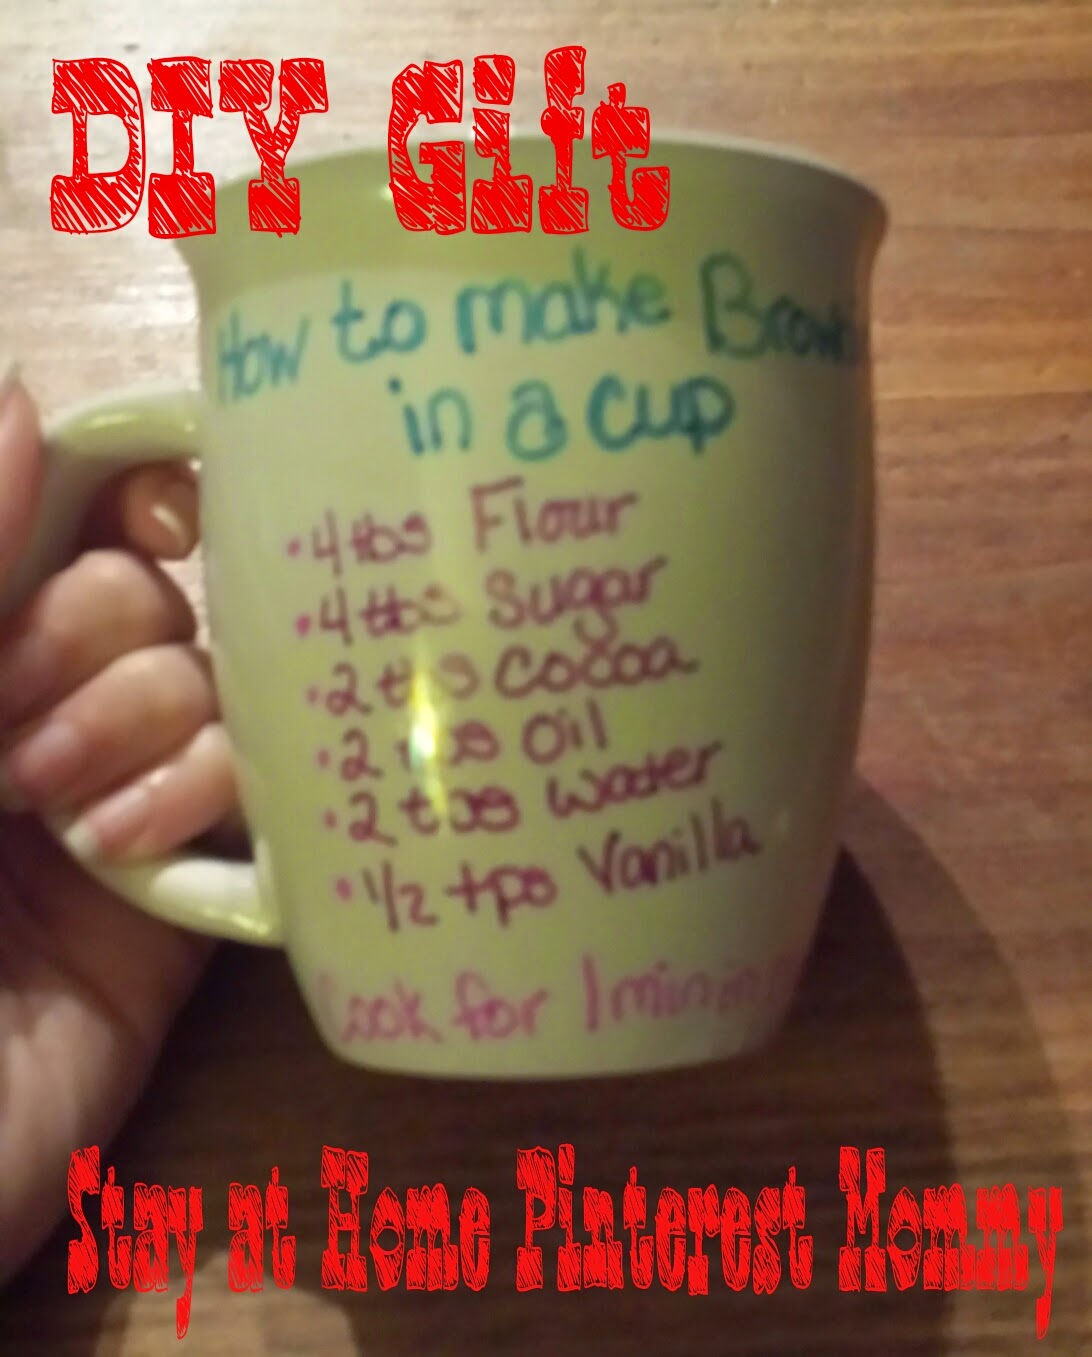
Brownies in a cup


Today I'm going to share a great DIY gift that I will be making more for my teen nieces and nephews this Christmas.

First you will start with a mug. I picked mine up at the dollar tree.
Write on your cup with the recipe with a sharpie.
  • 4 tbs Flour
  • 4 tbs Sugar
  • 2 tbs Cocoa
  • 2 tbs oil
  • 2 tbs water
  • 1/2 tps vanilla
  • Cook for 1 min in microwave

Place mug in oven at 350 for 30 min to bake the sharpie on the cup.

To make this gift complete I will be adding a couple bags of all the dry ingredients into the gift.

For more great DIY gifts check out my Pinterest page Follow Kristina Morud's board Gift Ideas on Pinterest. and make sure to check back next week for a new DIY gift from now till Christmas!

Would love to see your cups on Instagram!

Tuesday, September 23, 2014

Disney Movie Rewards


Today's Pinterest tip is probably not a new one if your family is a Disney fan like ours. You know those little papers that come in the movie can add up into some great prizes on Disney Movie Rewards. I save up the points through out the year to use them on some Christmas presents. They have so many great things to choose from they are not cheap things that end up in the trash (as parents we know how frustrating that is). My favorite is to save up for DVD's or Blu-rays something that I know our family will enjoy.

You are probably wondering what does this have to do with a Pinterest tip? Well did you know that you can follow Disney Movie Rewards on Pinterest. It's awesome they give away free codes once in a while and they have some awesome ideas on their page. It's worth a follow check them out! Christmas is coming up which means soon they will be giving out free codes almost everyday. So make sure to sign up at Disney Movie Rewards to start receiving points today!


Colored Rice


Sorry that I have been MIA for a while life has been crazy!

Today I have a fun activity for your little ones that they will love. My 2 year old fell in love with this activity and played for an hour or so with it. He had fun pouring the rice into his toy pots and pans.

When we were playing with this we went outside because it's a little messy.
Thank you eHow for this great sensory bin activity.
What you will need:
  • 1 cup of rice
  • 1 tablespoon of white vinegar
  • Ziplock bag
  • Food coloring
  • Plastic containers to hold rice after


What to do:

1.) Add the rice to the bag. Add vinegar and food coloring to the rice. I did 8 drops but if you want darker colors add more. And shake the bag till all rice is covered.

2.) Line a cookie sheet with foil. Pour rice on to the cookie sheet and spread the rice around with a spoon. Thinner it is quicker to dry.

3.) Let the cookie sheet of rice dry for a couple hours. Ours took about 3 hours. Once done your ready to play.

4.) Store the rice in a Ziplock bag or a airtight container.


Hope you guys enjoy this as much as we did. We will love to see your pictures on Instagram.

For more kid activities check out the tab above or my Pinterest board.
Follow Kristina Morud's board Things to do with the Kids on Pinterest.

Thursday, September 11, 2014

10 Money Saving Apps!


I'm always posting on recipes and activities. However lately we have been on a challenge of saving as much money as we can as a family to save up for our upcoming trip next summer. You might be wondering how are we doing that and I'm excited to share it with you. The first way that we are saving money is through apps. Yes you read that right Apps are helping our family save money. Thanks to Grocery Shop for Free for some new apps to add to our list.

10 Money Saving Apps:


  1. Saving Catcher: This is the new price match that all Walmart's are using. I have only used this once after price matching it caught an extra $5 that I missed when I was price matching with local stores. I will be using this a lot more when I'm grocery shopping!
  2. Saving Star: This is one that I haven't personal used but I have it on the list for this weeks shopping trip. From reading on Grocery Shop for Free it's great for specials on produce and Freebies on Friday.
  3. Shooger: Is a great app for local business in your area
  4. Ibotta: I'm in love with this app you can add the deals on the app with coupons for a low price and sometimes even free items. Who doesn't love free...I know I do. After you scan the product bar code and your receipt it's sent to be reviewed then you will earn your rebate. The rebate adds up and then you can cash out for gift cards or into a pay pal account. Let me tell you the rebates add up fast!
  5. Checkout 51
  6. Shopmium these last two can be added to Ibotta for even more savings. I haven't had much to do with them but I'm excited to see how much more I can save!
  7. Valpak
  8. Favado: Great to make your grocery list plus tell you what coupons to use to get the lowest price. Another plus is that there are links to print the printable coupons that you can use. No more searching. 
  9. Cardstar: no more searching for that reward card to the store this app lets you put them all in one place. You never have to worry about not having your card and missing on deals. We have all been there.
  10. Barcode Scanner: Scan products and get more information on the product or even price that it is in another store.
Hope you find these apps as useful as I have the last couple weeks. If you use an app that's not on the list I would love to hear about it in the comments.

For more money saving tips check out my Pinterest board
Follow Kristina Morud's board Coupons and budgets on Pinterest.


Tuesday, September 9, 2014

Smash Balls

This kids activity for today has been my 2 year old sons favorite for a year now. It's smash balls from time for play. Now I will say there is not much to this activity and reading alot of the comments on the post was like what's the point of this it just makes a mess. Yes it makes a mess but if you use a cookie sheet clean up is not so bad. I like doing this activity with my young one because it's great for his eye and hand coronation.

All you need:
Cotton Balls
1 cup flour
1 cup Water
Few drops of food color
Toy hammer

What to do
Preheat oven at 300
Mix flour and water
Add food color
Dip and cover cotton balls in the mixture. Place on cookie sheet lined with foil for easy clean up.
Bake in oven for 45 minutes

Once finished if you find the bottoms are to sharp you can cut and make them safer. I haven't had to this yet.

And now let you little one smash away those toy hammers are perfect for this!

Hope you guys enjoy this activity.

For more kids activities check out the tab above and my Pinterest board.

Monday, September 8, 2014

Cinnamon Sugar Apple Chips


Hi everyone sorry for missing last week the back to school bugs hit our house hard. Hope that's it for a while because two sick cranky kids was not fun one bit.

Today I have a yummy recipe that came from Jessica in the kitchen. With it now being September I'm looking forward to all the fall recipes and activities we have plans. And this was a favorite of mine growing up. I don't like plan apples...I know crazy but I love Apple Chips. Instead of munching on unhealthy chips this is perfect. To make them even more healthier you can skip the sugar and just use the cinnamon.

While making these I noticed I need a apple corer and a nice slicer ...honey if your reading this Christmas gift idea ;). As you can tell some of my apples where thick because I was using a knife and I'm not the best cutting thin with a knife it's usually me that I cut.

Ingredients
  • 2-4 apples (I only did 2 this time)
  • Cinnamon
  • Sugar


Directions
  1. Preheat oven to 200 degrees Fahrenheit.
  2. Thinly slice apples with a mandolin. On a greased baking sheet, Aarange apple slices so they aren't overlapping.
  3. In small bowl, combine sugar and cinnamon. Sprinkle on top of apple chips.
  4. Bake on the top rack of your oven for 2 hours until chips are dry and crisp. Flip half way through for even cooking.
  5. Remove from oven and let them cool completely. 
  6. Store in a zipped plastic bag for up to 3 days to stay crispy.


Hope you enjoy this recipe just as much as our family did.

For more recipes check out the tab above and also check out my Pinterest board.Follow Kristina Morud's board yummy food to try on Pinterest.

Wednesday, August 27, 2014

DIY Microdermabrasion

This is a great mommy time because all of us mom's would love to find the time to go to the spa and get facials. This is a great easy DIY for that to happen with out leaving the comfort of your home. All you will need is: 3 parts baking soda 1 part water to form a paste. Apply the paste in a circular motion and rinse. You don't want to do this everyday because it will dry out your skin but once in a while is always great. It gets the dead skin off your face and leaves it with a natural glow. I will be using this DIY again. For more tips like this check out the tab above (Pinterest Tips)

Bubble Bin


You may be thinking what does this activity have to do with fitness...the answer is simple the amount of arm workout that you can get from playing during this activity. We used a whisk to play with No Time For Flashcards for this great sensory activity.
which brought a little of workout into this activity. I think most of mine came from moving out of the way from the kids getting me soaked. I did this activity with my 2 year old and the 18 month old that I watch a couple days a week. They loved this so if you have little one bored at home while the older ones are at school this is a great easy activity. Thank you

We did this activity inside but next time we will be diffidently going outside....this is messy with little ones but easy to clean up its just water and soap!

What you will need:

  • A container to hold water
  • Dish soap
  • Food Color (optional)
  • Whisk
  • Water Toys if you would like
What to do:
Add the soap and water to the container. That's it simple now it's time to the kids at it to make some bubbles.

Hope you guys have fun. Don't forget to share pics of your bubble bins on Instagram we will love to see them!

For more great ideas like this checkout the kids activity tab above or my Pinterest board

  Follow Kristina Morud's board Things to do with the Kids on Pinterest.

Tuesday, August 26, 2014

Zucchini Pizza Bites


This is a great recipe for a quick lunch with the kids. I have been making these while we have been trying to eat clean. My 2 year old loves these and it's great because he doesn't even know its a veggie!
This great recipe came from The Comfort of Cooking. Thank you so much for this recipe its one of my go to easy lunch.

Zucchini Pizza Bites:

Ingredients:

  • 2 large zucchini's cut into 1/4  think rounds
  • Olive Oil
  • Salt and Pepper
  • 1/4 cup marinara sauce
  • 1/4 cup mozzarella cheese
  • Mini pepperoni (Optional)
  • Italian Seasoning for sprinkling
Directions:
  1. Rub olive oil on both sides of the zucchini. Sprinkle with salt and pepper. Broil on high for 2 minutes on each side.
  2. Once finished broiling add sauce, cheese and toppings to the zucchini. Then broil again for another 2-3 minutes. Be careful they can cook fast so just keep an eye on them.
Enjoy!

For more recipes check out the tab above or check out my Pinterest board
Follow Kristina Morud's board yummy food to try on Pinterest.

Thursday, August 21, 2014

August Workout #3

Happy Thursday!
Today I have a great little workout that you do at home while watching your favorite tv shows. All you need is a little floor space to move and thats it no equipment!!!!
Remember if you are on this new journey of eating right and working out and need that support feel free to comment or contact me because im doing this journey too!!! Your not alone :)
Hope you enjoy it!!!